Wood cladding exterior offers a timeless and versatile way to enhance the aesthetic appeal and value of any home. From the rustic charm of cedar to the sleek modernity of redwood, the choices are vast and varied, each bringing unique textural and visual elements to your exterior design. This guide delves into the world of wood cladding, exploring everything from material selection and installation techniques to long-term maintenance and cost considerations, empowering you to make informed decisions for your next project.
We’ll cover a wide range of topics, including the different types of wood cladding available, their respective pros and cons, and detailed instructions on how to install them correctly. We’ll also discuss design considerations, helping you integrate wood cladding seamlessly with other materials to create a stunning and cohesive exterior. Finally, we’ll address the crucial aspects of maintenance and preservation to ensure your wood cladding remains beautiful and functional for years to come.
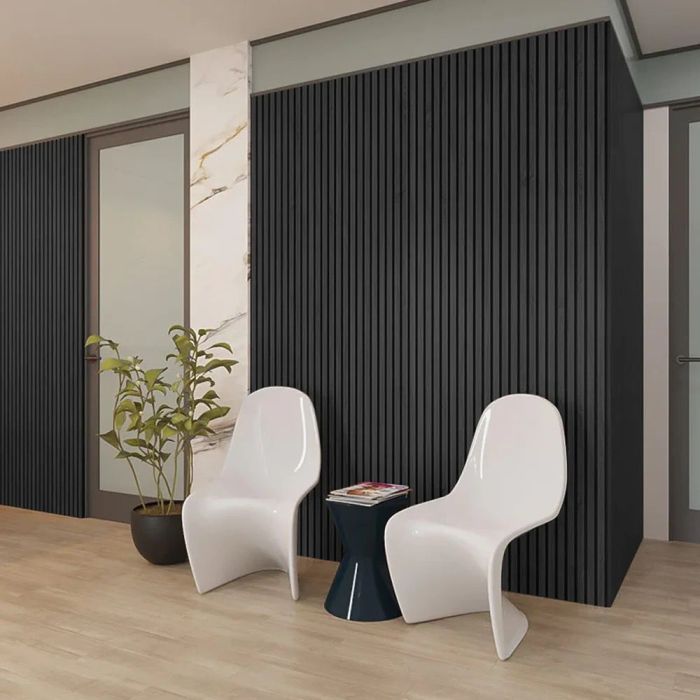
Types of Wood Cladding
Source: woodpanelwalls.com
Choosing the right wood cladding for your exterior project involves considering several factors, including durability, aesthetics, and environmental impact. Different wood species offer unique properties that cater to various needs and preferences. This section will explore the characteristics of popular wood cladding materials to help you make an informed decision.
Wood cladding offers a natural beauty and warmth that’s hard to replicate with other materials. However, understanding the differences between species is crucial for long-term success.
Wood cladding offers a timeless appeal for exterior design, adding warmth and texture to any home. For truly upscale projects, consider the options available when designing a Luxury home exterior , as wood cladding can be a key element in achieving that high-end look. Different types of wood and installation methods can significantly impact the final aesthetic, allowing for a range of luxurious finishes from rustic to modern.
Wood Cladding Material Properties
The following table summarizes the properties of several common wood cladding materials. Note that actual durability and cost can vary based on factors such as grade, treatment, and region.
Wood cladding offers a modern, versatile exterior finish, contrasting nicely with the classic appeal of a traditional brick home. If you’re considering a different look, you might check out examples of a Brick exterior house for inspiration before deciding on the best style for your home’s aesthetic. Ultimately, the choice between wood cladding and brick comes down to personal preference and the overall architectural style you’re aiming for.
| Wood Type | Durability | Maintenance | Cost (Relative) |
|---|---|---|---|
| Cedar (Western Red Cedar) | High; naturally resistant to rot and insects | Low to moderate; occasional cleaning and staining/sealing | Medium to High |
| Redwood | High; naturally resistant to rot and insects | Low to moderate; occasional cleaning and staining/sealing | Medium to High |
| Pine | Medium; susceptible to rot and insect damage if untreated | Moderate to High; regular treatment with preservatives and sealant | Low to Medium |
| Ipe | Very High; extremely durable and resistant to decay and insects | Low; requires minimal maintenance | High |
| Mahogany | High; naturally resistant to rot and insects | Low to moderate; occasional cleaning and oiling | High |
Aesthetic Qualities of Wood Cladding
The visual appeal of wood cladding is a significant factor in its selection. Different species offer distinct grain patterns, color variations, and overall textures.
- Cedar: Often features a straight grain with subtle variations in color, ranging from light reddish-brown to a deeper brown. It offers a classic, natural look.
- Redwood: Known for its rich reddish-brown hue and prominent grain patterns. It can range from a lighter, almost pinkish tone to a deep, dark brown.
- Pine: Typically has a lighter color, often yellowish or light brown, with a more pronounced grain pattern. It can be more readily stained to achieve various colors.
- Ipe: Characterized by its rich, dark brown to reddish-brown color and tight grain. It offers a sophisticated and luxurious appearance.
- Mahogany: Known for its deep reddish-brown color and beautiful, often interlocked grain pattern. It has a classic, elegant appearance.
Sustainability of Wood Cladding
The environmental impact of wood cladding is a growing concern for many homeowners. Sustainable sourcing and responsible forestry practices are crucial aspects to consider.
Choosing wood certified by organizations like the Forest Stewardship Council (FSC) ensures that the timber comes from responsibly managed forests. Species that grow quickly and require less processing, like some types of pine, can have a lower environmental footprint compared to slow-growing hardwoods. Additionally, the longevity of the cladding material contributes to its sustainability; a durable wood that lasts for decades reduces the need for frequent replacements.
Installation Methods
Installing wood cladding is a multifaceted process requiring careful planning and execution to ensure a long-lasting and aesthetically pleasing result. Proper substrate preparation is crucial for preventing future problems like rot and warping. The choice of fastening method will impact both the visual appeal and the structural integrity of the finished product.
Wood cladding exteriors are making a comeback, offering a warm and natural aesthetic. To see how this classic material fits into the broader picture, check out the predicted styles in Home exterior trends 2025 , which shows wood’s continued relevance. Ultimately, wood cladding remains a stylish and versatile choice for updating your home’s exterior.
The following steps provide a general guideline for installing wood cladding. Specific requirements may vary depending on the type of cladding, the substrate, and local building codes. Always consult professional advice and manufacturer instructions.
Wood cladding exterior offers a beautiful and natural aesthetic for your home. Choosing the right cladding is a key part of your overall Home exterior design , impacting everything from curb appeal to insulation. Different wood types and finishes provide varied textures and levels of maintenance, so careful consideration is needed to achieve your desired look and longevity for your wood cladding exterior.
Step-by-Step Wood Cladding Installation
This ordered list details the key steps involved in installing wood cladding. Careful attention to detail at each stage will contribute to a successful installation.
- Substrate Preparation: Thoroughly clean the surface of any dirt, debris, loose paint, or other imperfections. Repair any cracks or damage using appropriate fillers and sealants. Ensure the surface is level and dry. For added protection against moisture, consider applying a waterproof membrane.
- Framing (if necessary): Depending on the cladding type and substrate, you may need to install a framework of furring strips. This provides a consistent surface for attaching the cladding and allows for ventilation behind it.
- Cladding Installation: Begin installing the cladding at a corner or a prominent point, working your way outwards. Use appropriate fasteners (nails, screws, or clips) to secure each piece firmly to the substrate or framing. Ensure consistent spacing between boards and maintain alignment.
- Fastening Techniques: Use corrosion-resistant fasteners to prevent rust stains. Pre-drill pilot holes to prevent splitting, especially with hardwoods. Countersink fasteners to create a flush surface for a clean finish.
- Finishing: Once the cladding is installed, inspect for any gaps or inconsistencies. Caulk any gaps to prevent water infiltration. Apply a protective finish, such as a stain, sealant, or paint, to enhance the appearance and protect the wood from the elements. Allow ample drying time between coats.
Visual Representation of Installation
Imagine a wall, initially bare and perhaps showing underlying brickwork or sheathing. First, a waterproof membrane is applied, creating a protective barrier against moisture. Next, horizontal furring strips are installed, providing a framework for the cladding and ensuring proper ventilation. Then, the wood cladding boards are carefully positioned, starting from a corner. Each board is secured with stainless steel screws, pre-drilled pilot holes preventing splitting.
The screws are countersunk for a neat appearance. Finally, a protective wood sealant is applied, enhancing the color and protecting the wood from weathering. The finished product showcases a beautifully installed, weather-resistant wood cladding system.
Comparison of Installation Methods
Different installation methods offer distinct advantages and disadvantages. The optimal choice depends on factors such as aesthetic preferences, budget, and the specific properties of the wood cladding.
| Installation Method | Advantages | Disadvantages | Cost |
|---|---|---|---|
| Horizontal | Classic look, emphasizes horizontal lines, easier to install for some profiles | More susceptible to water damage if not properly installed and sealed, can highlight imperfections in the wall | Moderate |
| Vertical | Modern look, minimizes the appearance of horizontal lines, can create a taller appearance | Can be more challenging to install, potentially more expensive due to increased material usage in some cases | Moderate to High |
| Overlapping (Shiplap or similar) | Creates a rustic or traditional look, naturally sheds water, covers minor imperfections in the wall | Requires more material than other methods, can be more time-consuming to install | Moderate to High |
Design Considerations: Wood Cladding Exterior

Source: made-in-china.com
Wood cladding offers a versatile and aesthetically pleasing exterior finish, significantly impacting a building’s overall architectural style and curb appeal. The choice of wood type, color, and installation method all contribute to the final design, allowing for a wide range of expressions, from rustic charm to modern minimalism. Careful consideration of these elements is crucial for achieving a cohesive and visually appealing outcome.
Wood Cladding and Architectural Styles
The versatility of wood cladding allows it to complement a variety of architectural styles. Different species, finishes, and installation patterns can dramatically alter the perceived aesthetic.
- Rustic/Farmhouse: Think wide, rough-hewn planks of cedar or reclaimed wood, often installed horizontally with visible gaps for a weathered, aged look. This style evokes a sense of warmth and traditional craftsmanship.
- Modern/Contemporary: Clean lines and precise installation are key. Narrow, smooth planks of ipe or redwood, installed vertically or in a herringbone pattern, create a sleek and sophisticated appearance. Darker wood stains are often favored.
- Traditional/Victorian: Detailed paneling, intricate carvings, and a variety of wood species can be used to create a richly ornamented facade. This style often incorporates multiple wood tones and textures for visual interest.
- Craftsman/Mission: This style emphasizes natural materials and handcrafted details. Horizontal wood cladding with exposed beams and natural wood stains creates a sense of warmth and organic simplicity.
Integrating Wood Cladding with Other Materials
Combining wood cladding with other materials can enhance the building’s visual appeal and create a unique architectural statement. Strategic integration creates depth and texture.
Wood and Stone: A classic combination, often seen in mountain lodges or homes with a rustic aesthetic. The warmth of the wood contrasts beautifully with the cool, rugged texture of the stone, creating a balanced and inviting facade. Imagine a stone foundation topped with cedar cladding, perhaps with stone accents around windows and doorways.
Wood and Brick: This pairing offers a blend of traditional and modern elements. Brick provides a solid, grounded base, while wood cladding adds warmth and visual interest to the upper levels or accents. A brick base could be combined with vertical wood siding, offering a classic yet updated look.
Wood and Metal: A contemporary combination that creates a striking contrast between natural and industrial elements. Metal accents, such as window frames or flashing, can complement the natural beauty of wood cladding, while adding a touch of modern sophistication. Think of a sleek metal roofline paired with dark stained vertical wood cladding.
Key Design Elements for Wood Cladding Selection
Choosing the right wood cladding involves careful consideration of several key design elements. These choices will directly impact the final appearance and longevity of your project.
- Color: Wood stains and finishes offer a vast range of color options, from natural wood tones to vibrant hues. Consider the surrounding environment and the overall architectural style when selecting a color.
- Texture: The texture of the wood cladding, whether smooth, rough, or grooved, significantly impacts the overall aesthetic. Smooth planks offer a modern feel, while rough-hewn planks create a more rustic appearance.
- Pattern: The pattern of the wood cladding, such as horizontal, vertical, or diagonal, influences the visual perception of the building’s height and width. Vertical cladding can make a building appear taller, while horizontal cladding can make it appear wider.
Maintenance and Preservation
Wood cladding, while beautiful and durable, requires regular maintenance to ensure its longevity and aesthetic appeal. Neglecting this can lead to costly repairs and premature deterioration. This section Artikels essential maintenance practices, potential problems, and a preventative maintenance schedule to keep your wood cladding looking its best for years to come.
Cleaning Techniques
Regular cleaning is crucial for removing dirt, debris, and pollutants that can damage the wood’s finish and encourage the growth of mold and mildew. For routine cleaning, a gentle solution of mild detergent and water applied with a soft brush or sponge is usually sufficient. Rinse thoroughly with clean water afterward, ensuring all soap residue is removed. For more stubborn stains, consider using a pressure washer (low pressure setting) to gently remove ingrained dirt.
Always test any cleaning solution on a small, inconspicuous area first to check for any adverse reactions. Avoid abrasive cleaners or harsh chemicals that could damage the wood’s surface.
Wood cladding exteriors offer a timeless and versatile look for homes. If you’re exploring options, check out some inspiring ideas at Best home exterior ideas to see how different materials and styles can transform a house. Ultimately, wood cladding provides a warm, natural aesthetic that can significantly enhance your home’s curb appeal.
Stain Application
Applying a protective stain or sealant is vital for safeguarding your wood cladding against the elements. This helps to prevent water damage, UV degradation, and insect infestation. The type of stain chosen depends on the desired aesthetic and level of protection. Oil-based stains penetrate deeply into the wood, providing excellent protection, while water-based stains offer a more environmentally friendly option with good protection.
Before applying any stain, ensure the wood is clean, dry, and free from any loose debris. Follow the manufacturer’s instructions carefully for application and drying time. Regular reapplication, typically every 2-3 years depending on the climate and stain type, is necessary to maintain protection.
Repair Methods
Minor repairs, such as replacing damaged or rotten boards, can often be handled by a homeowner with basic carpentry skills. Replacing a single board typically involves removing the damaged piece, ensuring a proper fit with the adjacent boards, and securing the new board with appropriate fasteners. For larger repairs or extensive damage, it’s best to consult a professional. Damaged areas should be addressed promptly to prevent further deterioration.
Wood fillers can be used to repair minor cracks or holes before staining or sealing.
Potential Issues and Preventive Measures, Wood cladding exterior
Ignoring preventative maintenance can lead to several issues. Understanding these potential problems allows for proactive measures to protect your investment.
- Rot: Prolonged exposure to moisture is the primary cause of rot. Proper sealing, ensuring adequate ventilation, and promptly addressing any leaks are crucial preventative measures.
- Insect Infestation: Wood-boring insects can weaken and damage the cladding. Regular inspections, preventative treatments (such as borate solutions), and using insect-resistant wood species can help minimize this risk.
- Weathering: Exposure to sun, rain, and wind can cause fading, cracking, and warping. Using high-quality stains and sealants with UV protection, and ensuring proper installation, helps to mitigate weathering effects.
- Mold and Mildew: These fungi thrive in damp environments. Regular cleaning, ensuring good ventilation, and prompt repair of any water damage will help prevent their growth.
Preventative Maintenance Schedule
A regular maintenance schedule is key to extending the life of your wood cladding. This schedule provides a guideline; adjustments may be necessary depending on your specific climate and the type of wood used.
| Task | Frequency |
|---|---|
| Cleaning | Twice yearly (spring and fall) |
| Inspection for damage | Twice yearly (spring and fall) |
| Stain/Sealant Reapplication | Every 2-3 years |
| Minor Repairs | As needed |
Cost and Budget
Choosing wood cladding for your home’s exterior is a significant investment, and understanding the associated costs is crucial for successful project planning. Several factors contribute to the overall expense, making careful budgeting essential. This section will explore these factors and provide a sample budget breakdown to help you navigate the financial aspects of your project.Factors Influencing Wood Cladding CostsThe cost of wood cladding varies considerably depending on several key factors.
Material selection plays a significant role, with exotic hardwoods like cedar or ipe commanding much higher prices than more common softwoods like pine or fir. The complexity of the installation also impacts the final cost. Intricate designs, numerous corners, or challenging architectural features will require more labor and time, leading to higher expenses. Labor costs themselves are geographically dependent and fluctuate based on local market conditions and the installer’s experience.
Permitting fees also add to the overall project cost and vary by location and project scope. Finally, the quantity of materials needed directly impacts the total expense; a larger house will obviously require more cladding.
Wood cladding offers a warm, natural aesthetic for your home’s exterior, but if you’re looking for something with a different texture and feel, you might consider alternatives. A popular choice is stone veneer, which provides a more rugged and substantial look; check out this guide on Stone veneer for home exterior for ideas. Ultimately, the best exterior cladding depends on your personal style and the overall design of your house, and wood cladding remains a classic and versatile option.
Sample Budget Breakdown
The following table provides a sample budget breakdown for a medium-sized house (approximately 1500 square feet) using cedar wood cladding. Remember that these are estimates, and actual costs may vary based on the specific circumstances of your project.
| Item | Quantity | Unit Cost | Total Cost |
|---|---|---|---|
| Cedar Cladding | 1500 sq ft | $15/sq ft | $22,500 |
| Underlayment | 1500 sq ft | $2/sq ft | $3,000 |
| Fasteners | Various | $500 | $500 |
| Labor (Installation) | 10 days | $500/day | $5,000 |
| Permits | 1 | $500 | $500 |
| Contingency (10%) | – | – | $3,000 |
| Total Estimated Cost | – | – | $34,500 |
Note: This is a simplified example. Actual costs can vary significantly based on factors such as material quality, labor rates, and project complexity. Always obtain multiple quotes from reputable contractors.
Long-Term Cost-Effectiveness
Compared to other exterior siding options like vinyl or aluminum, wood cladding offers a unique balance of aesthetics, durability, and long-term value. While the initial investment might be higher, wood cladding typically lasts longer with proper maintenance, potentially reducing replacement costs over the lifespan of the home. Vinyl and aluminum siding, while less expensive upfront, may require more frequent repairs or even complete replacements due to fading, damage, or deterioration, leading to higher overall costs in the long run.
The resale value of a home with high-quality wood cladding is also generally higher than one with less durable siding options. The long-term cost-effectiveness ultimately depends on factors such as material choice, maintenance practices, and the expected lifespan of the chosen siding. A thorough cost-benefit analysis considering all these factors is recommended before making a final decision.
Closure
Ultimately, choosing wood cladding for your exterior is an investment that pays off in both aesthetic enhancement and long-term value. By carefully considering the factors discussed – from material selection and installation to maintenance and cost – you can create an exterior that is both beautiful and durable. Remember to weigh the pros and cons of different wood types, installation methods, and design considerations to find the perfect fit for your project and budget.
With proper planning and care, your wood cladding will stand as a testament to your home’s enduring style and charm.
FAQs
How long does wood cladding typically last?
The lifespan of wood cladding varies greatly depending on the type of wood, climate, and maintenance. With proper care, many types can last 20-30 years or more.
Is wood cladding a good insulator?
Wood itself is a relatively good insulator, but the insulating properties of wood cladding depend on factors like thickness and installation. Adding insulation behind the cladding is often recommended for optimal energy efficiency.
Can I install wood cladding myself?
While possible for some DIY enthusiasts with experience, professional installation is often recommended, especially for larger projects or complex designs. Improper installation can lead to issues down the line.
What’s the best way to clean wood cladding?
Regular cleaning with a mild detergent and water is usually sufficient. Avoid harsh chemicals or pressure washing, which can damage the wood.
How do I prevent insect infestation in my wood cladding?
Choosing pressure-treated wood or applying a protective sealant can help prevent insect damage. Regular inspections are also crucial for early detection of any infestations.


