Vinyl siding maintenance tips and tricks for homeowners are essential for preserving the beauty and longevity of your home’s exterior. Proper care prevents costly repairs and enhances curb appeal. This guide provides a comprehensive approach to cleaning, repairing, and protecting your vinyl siding, ensuring it remains a valuable asset for years to come. We’ll cover everything from basic cleaning techniques to addressing more significant damage, empowering you to maintain your home’s exterior with confidence.
From understanding the different types of vinyl siding and their unique maintenance needs to mastering the art of pressure washing and stain removal, this guide offers practical advice and step-by-step instructions. We’ll explore essential tools and equipment, preventative measures, and the importance of regular inspections. By following these tips and tricks, you can keep your vinyl siding looking its best and protect your investment.
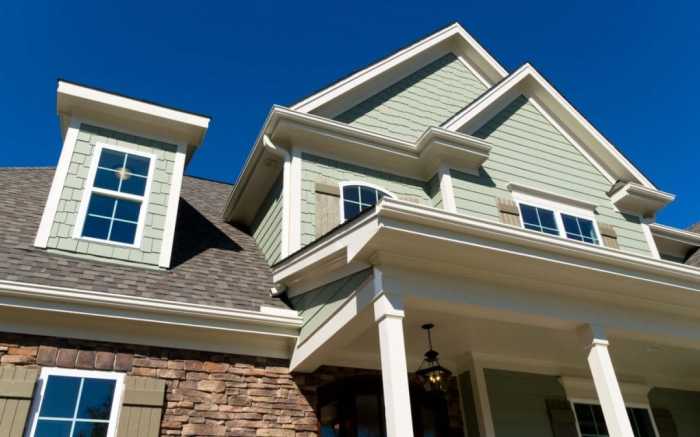
Cleaning Vinyl Siding

Source: sidingauthority.com
Keeping your vinyl siding clean not only enhances your home’s curb appeal but also protects it from long-term damage. Regular cleaning prevents the buildup of dirt, mildew, and algae, which can compromise the siding’s integrity and lead to premature deterioration. This section details effective cleaning methods for various situations.
Cleaning Vinyl Siding with Different Solutions
Choosing the right cleaning solution is crucial for effective and safe vinyl siding maintenance. Different solutions cater to varying levels of dirt and grime. The following table compares several options:
| Cleaning Agent | Pros | Cons | Appropriate Usage |
|---|---|---|---|
| Mild Detergent Solution (e.g., dish soap) | Gentle, readily available, inexpensive | May not be effective against stubborn stains | Regular cleaning, light dirt and grime |
| Bleach Solution (diluted) | Effective against mildew and algae | Can discolor siding if used improperly, harsh on plants | Stubborn stains, mildew, algae (use with caution) |
| Specialized Vinyl Siding Cleaner | Formulated for vinyl, often effective on various stains | More expensive than other options | Various levels of dirt and grime, including stubborn stains |
Pressure Washing Vinyl Siding
Pressure washing can be highly effective for removing stubborn dirt and grime, but improper technique can damage your siding. Always maintain a safe distance from the surface and use a low-pressure setting. A fan-tip nozzle is recommended to distribute the water evenly, preventing concentrated pressure that could cause damage.
- Maintain a distance of 12-18 inches from the siding.
- Use a low-pressure setting on your pressure washer.
- Employ a fan-tip nozzle for even water distribution.
- Work from the bottom up to prevent streaking.
- Rinse thoroughly after cleaning.
Essential safety equipment for pressure washing includes:
- Safety goggles to protect your eyes from debris.
- Rubber gloves to protect your hands from chemicals and water.
- Closed-toe shoes to protect your feet.
- Ear protection to reduce noise exposure.
Cleaning Stubborn Stains on Vinyl Siding
Mildew and algae are common culprits behind stubborn stains on vinyl siding. For mildew and algae, a diluted bleach solution (typically 1 part bleach to 3 parts water) is often effective. Apply the solution with a soft-bristled brush, allow it to sit for a few minutes, and then rinse thoroughly with water. For particularly persistent stains, a specialized vinyl cleaner or a solution of trisodium phosphate (TSP) may be necessary.
Regular cleaning and occasional repairs are key to maintaining your vinyl siding. Understanding the nuances of siding care is crucial, especially if you’re aiming for a historically accurate look, as improper choices can detract from the overall aesthetic. To avoid common pitfalls, it’s helpful to review information on common mistakes to avoid when designing a colonial style home exterior , which can inform your siding choices and maintenance plan.
Ultimately, proactive maintenance will ensure your vinyl siding remains attractive and durable for years to come.
Always test any cleaning solution in an inconspicuous area first to ensure it doesn’t damage the siding. Remember to follow product instructions carefully and wear appropriate safety gear. For oil-based stains, a degreaser may be needed followed by a thorough rinsing. For rust stains, a commercial rust remover may be effective, again, always test in an inconspicuous area first.
Repairing Minor Damage: Vinyl Siding Maintenance Tips And Tricks For Homeowners
Maintaining the pristine appearance and structural integrity of your vinyl siding involves addressing minor damage promptly. Ignoring small issues can lead to larger, more costly repairs down the line. This section details common damage types, repair methods, and a step-by-step guide for panel replacement.
Common Vinyl Siding Damage and Repair Methods
The following table Artikels common types of vinyl siding damage and suitable repair techniques. Remember to always prioritize safety and use appropriate personal protective equipment (PPE) such as gloves and safety glasses.
| Damage Type | Repair Method | Required Materials |
|---|---|---|
| Cracks | For small cracks, carefully clean the area and apply a high-quality exterior-grade vinyl caulk. For larger cracks, the damaged section may need replacement. | Exterior-grade vinyl caulk, putty knife, cleaning solution |
| Dents | Minor dents can often be removed by gently warming the area with a hairdryer (on a low setting) and then carefully pushing the dent back into place. For deeper dents, replacement may be necessary. | Hairdryer, putty knife (optional) |
| Holes | Small holes can be filled with exterior-grade vinyl caulk or a specialized vinyl repair putty. Larger holes usually require replacing the damaged panel. | Exterior-grade vinyl caulk or vinyl repair putty, putty knife |
| Loose Panels | Loose panels often indicate a problem with the underlying fasteners. Carefully remove the panel, inspect the fasteners, and reattach the panel using new fasteners if necessary. | Screwdriver, new nails or screws |
Replacing a Damaged Vinyl Siding Panel
Replacing a damaged vinyl siding panel is a straightforward process if approached methodically. This step-by-step guide illustrates the procedure.
Regular cleaning and occasional repairs are key for maintaining vinyl siding, ensuring your home’s exterior stays looking its best. For instance, the striking visual appeal of a colonial style home exterior with stone accents can be significantly enhanced with proper siding care. This involves promptly addressing any damage to prevent further issues and maintain the overall aesthetic of your home’s exterior, regardless of its architectural style.
- Preparation: Gather the necessary tools and materials: replacement panel, pry bar, utility knife, hammer, nails or screws, and safety glasses. Ensure the replacement panel matches the existing siding in color and style.
- Removal of the Damaged Panel: Carefully insert the pry bar under the bottom edge of the damaged panel, being mindful not to scratch the surrounding siding. Gently pry the panel away from the underlying structure. Work your way up, releasing the panel from its fasteners. If necessary, use the utility knife to carefully cut any caulk or sealant securing the panel.
- Inspection and Preparation: Inspect the area behind the removed panel for any damage to the underlying sheathing or fasteners. Replace any damaged or deteriorated components. Clean the area to remove any debris.
- Installation of the New Panel: Starting at the bottom, carefully align the new panel with the surrounding siding. Use nails or screws to secure the panel, following the manufacturer’s instructions regarding spacing and fastener type. Avoid over-tightening.
- Finishing: Once the panel is securely fastened, inspect for any gaps or misalignments. Apply a bead of exterior-grade caulk to seal any gaps between the new panel and adjacent panels. Allow the caulk to dry completely.
Caulking Gaps and Seams, Vinyl siding maintenance tips and tricks for homeowners
Proper caulking of gaps and seams in vinyl siding is crucial for preventing water damage and air leaks. Use a high-quality, paintable, exterior-grade caulk specifically designed for use with vinyl siding. Apply a thin, even bead of caulk, ensuring complete coverage of the gap or seam. Smooth the caulk with a damp finger or putty knife for a professional finish.
Allow the caulk to cure completely before painting, if necessary. Regular inspection and recaulking as needed are recommended, particularly in areas exposed to harsh weather conditions. For example, recaulking around windows and doors annually can significantly improve energy efficiency and prevent water intrusion.
Preventing Future Damage
Regular inspection and maintenance are crucial for extending the lifespan of your vinyl siding and preventing costly repairs down the line. By proactively addressing minor issues, you can avoid significant damage caused by neglected problems. A small crack today could lead to extensive water damage and panel replacement tomorrow. Think of it as preventative medicine for your home’s exterior.Proactive maintenance significantly reduces the likelihood of major problems developing.
Regular cleaning and occasional power washing are key to maintaining your vinyl siding. If you’re considering a more extensive exterior refresh, however, check out these colonial style home exterior renovation ideas on a budget for inspiration before tackling your siding. Remember, proper siding maintenance will protect your investment and keep your home looking its best, regardless of your renovation plans.
Catching issues early allows for simple and affordable solutions, saving you both time and money in the long run. A thorough inspection should be conducted at least twice a year, ideally in spring and fall, to check for any potential problems before they escalate.
Vinyl Siding Inspection Checklist
A systematic approach to inspection ensures nothing is overlooked. This checklist covers key areas to examine during your twice-yearly inspection.
- Overall Appearance: Look for any signs of discoloration, warping, cracking, or damage to the siding panels.
- Panel Connections: Check for loose or improperly fastened panels. Gently try to move panels to detect any looseness.
- Flashing: Inspect all flashing around windows, doors, and other penetrations in the siding. Look for rust, gaps, or damage. Flashing protects against water intrusion.
- Caulking: Examine the caulking around windows, doors, and other areas where the siding meets other building materials. Replace any cracked or deteriorated caulking.
- Gutters and Downspouts: Ensure gutters and downspouts are clean and free of debris to prevent water from overflowing and damaging the siding. Check for proper drainage away from the foundation.
- Foundation: Observe the foundation for any signs of settling or cracks, which could put stress on the siding.
- Landscaping: Ensure shrubs and other plants are trimmed back from the siding to prevent moisture buildup and damage.
Addressing Potential Problems
Identifying and addressing potential problems promptly is key to preventing major repairs. For example, a loose panel, if left unattended, can allow water to penetrate behind the siding, leading to rot and mold. Similarly, damaged flashing can cause water to seep into the walls of your house, causing significant damage. Clogged gutters can lead to water overflow, damaging the siding and foundation.
- Loose Panels: Tighten loose panels using appropriate screws or nails. If the panel is severely damaged, it may need to be replaced.
- Damaged Flashing: Replace any damaged or rusted flashing with new, appropriately sized material. Use a high-quality sealant to ensure a watertight seal.
- Clogged Gutters: Regularly clean gutters and downspouts to prevent clogs. Consider installing gutter guards to reduce the frequency of cleaning.
Protecting Vinyl Siding from Harsh Weather
Extreme weather conditions can significantly impact the longevity of your vinyl siding. Taking preventative measures can minimize the effects of these conditions.
- Extreme Heat: Direct sunlight can cause vinyl siding to expand and potentially warp. Planting trees or installing awnings can provide shade and reduce the impact of intense heat. Regular cleaning can help reflect sunlight and keep the siding cool.
- Heavy Snow: Heavy snow accumulation can put stress on the siding and potentially cause damage. Regularly remove snow from the siding, particularly from areas prone to accumulation, such as roof overhangs. Consider using a soft broom to prevent scratching the surface.
- High Winds: Strong winds can damage or dislodge siding. Ensure all panels are securely fastened and consider adding wind bracing in areas particularly exposed to high winds.
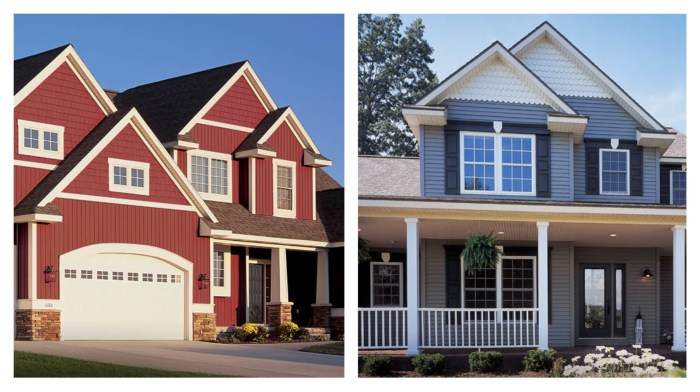
Understanding Vinyl Siding Materials & Types
Source: oasishomeinspections.com
Regular cleaning and occasional repairs are key to maintaining your vinyl siding. A well-maintained exterior enhances your home’s curb appeal, and this is further amplified by thoughtful landscaping. For inspiration on complementing your home’s style, check out these landscaping ideas for a colonial style home exterior , which can beautifully showcase your siding. Ultimately, both proper siding care and strategic landscaping contribute to a stunning and well-preserved property.
Choosing the right vinyl siding involves understanding the various types available and their respective characteristics. This knowledge will help homeowners make informed decisions based on their budget, aesthetic preferences, and the specific demands of their climate and home style. Careful consideration of material properties and system components ensures a long-lasting and attractive exterior.
Vinyl Siding Types: A Comparison
Different vinyl siding profiles offer diverse aesthetic options and performance characteristics. The following table summarizes key differences between common types:
| Siding Type | Durability | Maintenance | Aesthetic Appeal |
|---|---|---|---|
| Clapboard (Bevel) | High; resists impact and weathering. | Low; requires occasional cleaning. | Classic, traditional look; versatile for various architectural styles. |
| Shingle | Moderate; susceptible to damage from strong winds in certain designs. | Moderate; requires occasional cleaning and potential repair of damaged shingles. | Provides a textured, layered appearance; mimics wood shake or slate. |
| Shake | Moderate; more prone to damage than clapboard due to its textured surface. | Moderate to High; requires more frequent cleaning and potential repair due to its textured surface. | Rustic, natural look; creates a textured, wood-like appearance. |
Vinyl Siding System Components and Functions
A complete vinyl siding system comprises several key components, each playing a crucial role in its overall performance and longevity. Understanding these components is vital for proper installation and maintenance.
Panels: These are the primary visible elements, providing the exterior covering for the house. They come in various styles, colors, and textures.
Trim: This includes pieces like corner boards, J-channels, and window/door trim. These components provide a neat finish, protect edges, and allow for proper installation and expansion/contraction of the siding.
Flashing: This waterproof material, typically metal, is installed under the siding around windows, doors, and other openings to prevent water penetration. Proper flashing is critical for preventing water damage.
Soffit and Fascia: These components cover the underside of the eaves and the vertical board at the edge of the roof. They protect the underlying structure and contribute to the overall aesthetic.
Common Vinyl Siding Manufacturers and Warranty Information
Several reputable manufacturers produce vinyl siding, each offering varying warranty terms. While specific coverage can change, typical warranties often include protection against defects in materials and workmanship for a period ranging from 20 to 50 years. It’s crucial to review the specific warranty documentation provided by the manufacturer for details regarding coverage, limitations, and claims procedures. Examples of manufacturers include CertainTeed, James Hardie, and Alside.
Regular cleaning and occasional power washing are key for maintaining your vinyl siding. Choosing the right paint color can significantly enhance your home’s curb appeal, and if you have a colonial-style home, you might find inspiration in this article on best colonial style home exterior paint colors for curb appeal. Remember, proper siding maintenance, including addressing any damage promptly, will protect your investment and keep your home looking its best for years to come.
These companies offer extensive warranties that cover defects in materials and workmanship, although the specifics vary depending on the product line and purchase date. Always consult the manufacturer’s website or contact them directly for the most up-to-date warranty information.
Tools and Equipment
Maintaining your vinyl siding requires the right tools for effective and safe cleaning and repair. Investing in quality equipment will save you time and effort in the long run, and prevent accidental damage to your siding. The following tools are essential for various maintenance tasks.
Essential Tools and Equipment for Vinyl Siding Maintenance
Proper tools are crucial for effective vinyl siding maintenance. Using the wrong tools can lead to damage, so careful selection is important. The table below Artikels essential tools, their functions, and recommended brands (note that brand recommendations are suggestions and other comparable brands are equally suitable).
| Tool Name | Function | Recommended Brands |
|---|---|---|
| Pressure Washer | Cleans large areas quickly and effectively, removing dirt, grime, and mildew. | Simpson, Generac, Ryobi |
| Garden Hose with Adjustable Nozzle | Rinsing siding after cleaning, spot cleaning smaller areas. | Various brands available at home improvement stores. |
| Soft-Bristled Brushes (various sizes) | Scrubbing stubborn stains and mildew, reaching tight spaces. | Wooster, Purdy |
| Plastic Scraper | Gently removing loose paint, debris, or minor scuffs without scratching the siding. | Various brands available at home improvement stores. |
| Putty Knife (Plastic or Metal) | Applying caulk, removing loose siding pieces carefully. | Stanley, Hyde |
| Safety Glasses | Protecting eyes from debris and cleaning solutions. | Various brands available at home improvement stores. |
| Work Gloves | Protecting hands from chemicals and rough surfaces. | Various brands available at home improvement stores. |
| Ladder (if necessary) | Safely reaching higher areas of the siding. Always ensure proper ladder setup and use. | Werner, Little Giant |
| Cleaning Solutions (e.g., mild detergent, bleach solution) | Removing dirt, mildew, and other stains. | Various brands available at home improvement stores. Always follow product instructions. |
Proper Use of Cleaning Tools
Pressure washers should be used at a low pressure setting to avoid damaging the vinyl siding. Maintain a consistent distance from the surface (approximately 12-18 inches) and move the wand steadily across the siding. For stubborn stains, a soft-bristled brush can be used in conjunction with a cleaning solution. Plastic scrapers should be used gently to avoid scratching the siding.
Always test any cleaning solution in an inconspicuous area first to ensure it doesn’t damage the vinyl.
Safe Handling and Storage of Cleaning Solutions
Always wear safety glasses and work gloves when handling cleaning solutions. Store cleaning solutions in their original containers, away from children and pets. Follow all manufacturer instructions for mixing and using cleaning solutions. Never mix different cleaning solutions together, as this can create dangerous fumes or reactions. Dispose of cleaning solutions properly according to local regulations.
For example, bleach solutions should be diluted significantly before use and rinsed thoroughly. Leftover solutions should be disposed of in accordance with local waste disposal guidelines.
Final Wrap-Up
Source: empiresidingandwindows.com
Maintaining your vinyl siding doesn’t have to be a daunting task. By implementing the cleaning, repair, and preventative measures Artikeld in this guide, you can significantly extend the life of your siding and maintain your home’s aesthetic appeal. Regular inspections, prompt attention to minor damage, and understanding the specific needs of your siding type will ensure its long-term durability and protect your investment.
Remember, proactive maintenance is key to preventing costly repairs and preserving the beauty of your home for years to come.
Popular Questions
Can I use a wire brush to clean my vinyl siding?
No, avoid using wire brushes as they can scratch the surface of the vinyl siding, causing irreversible damage.
How often should I inspect my vinyl siding?
It’s recommended to inspect your vinyl siding at least twice a year, in spring and fall, to identify and address any potential issues early on.
What is the best way to remove paint from vinyl siding?
Use a paint remover specifically designed for vinyl siding, following the manufacturer’s instructions carefully. Test in an inconspicuous area first.
How do I know if my vinyl siding needs replacing?
Signs of needing replacement include significant cracks, holes that cannot be repaired, severe warping or discoloration that cannot be cleaned, and persistent water damage.
What type of warranty should I expect on new vinyl siding?
Warranties vary by manufacturer, but you can typically expect a warranty covering defects in materials and workmanship for a period of 20-30 years.


